Cisco : MACSec (Media Access Control Security)

This describes how to enable MACSec (Media Access Control Security) Encryption between two Catalyst Switches. MACSec is the standard for authenticating and encrypting the data link layer between switches. IEEE 802.1.AE.

Configuring MACSec

interface TenGigabitEthernet1/0/48
   cts manual
   no propagate sgt
   sap pmk 0000000000000000000000000000000000000000000000000000001234ABCDEF mode-list gcm-encrypt null no-encap

Below is an example config for Macsec with AES-256 encryption.   This config needs to be on both sides of the switches.  Was tested on a 3650-12x48UZ running ios-xe version 16.3.2.     Please update the keystring each time you use it with another random set of digits.  The length of the string has to be the same as below (64).

key chain mka_keychain macsec
    key 1234
    cryptographic-algorithm aes-256-cmac
 key-string 7586258746587645873490731985370957385753195709435175415784768466
 lifetime local 00:00:00 Jan 1 2000 infinite
 mka policy mka_policy_256
  key-server priority 2
 macsec-cipher-suite gcm-aes-256
interface GigabitEthernet1/0/1
 switchport mode trunk
 macsec network-link
 mka policy mka_policy_256
 mka pre-shared-key key-chain mka_keychain

Checking to Make sure the MKA Session is up and secure.

Switch#sh mka session

Total MKA Sessions....... 1

      Secured Sessions... 1

      Pending Sessions... 0

====================================================================================================

Interface      Local-TxSCI         Policy-Name      Inherited         Key-Server

Port-ID        Peer-RxSCI          MACsec-Peers     Status            CKN

====================================================================================================

Te1/0/48       00f6.6389.8b30/0037 test             NO                YES

55             00fe.c8d4.44b0/0037 1                Secured           1234000000000000000000000000000000000000000000000000000000000000

Verify MACSec is enabled.

Switch#sh macsec int ten1/0/48

MACsec is enabled
   Replay protect : enabled
   Replay window : 0
   Include SCI : yes
   Use ES Enable : no
   Use SCB Enable : no
   Admin Pt2Pt MAC : forceTrue(1)
   Pt2Pt MAC Operational : no
   Cipher : GCM-AES-256
   Confidentiality Offset : 0

Data Centre : Post DC Move Unracking

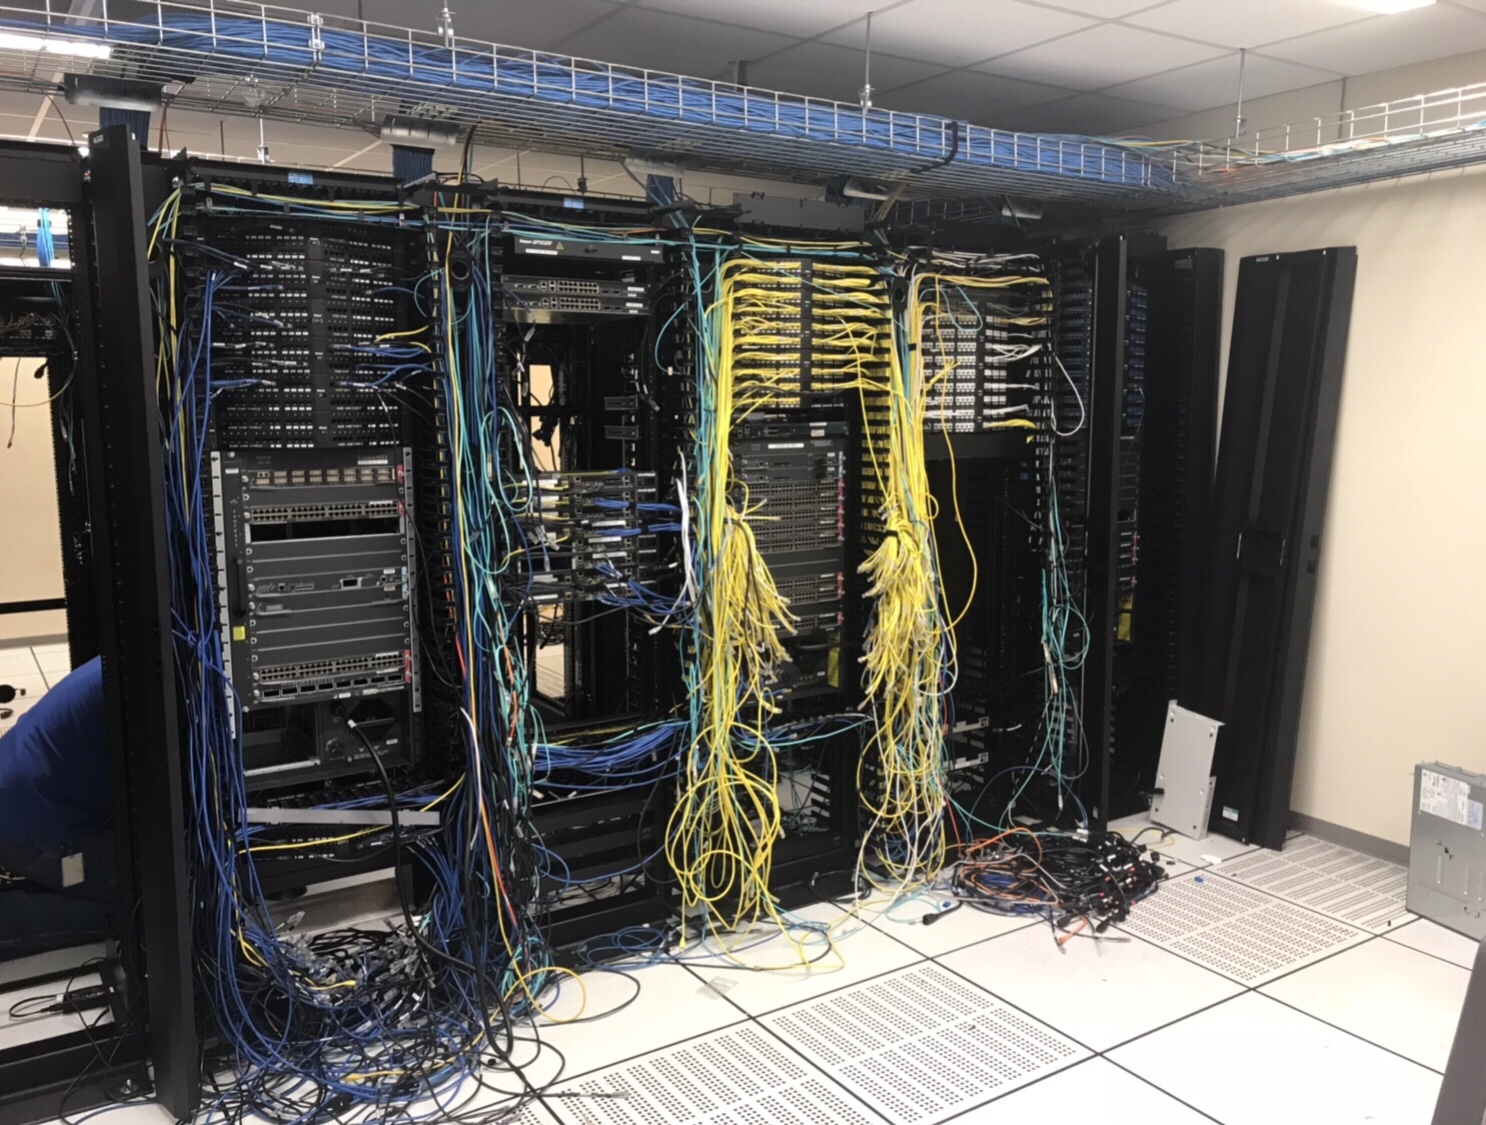
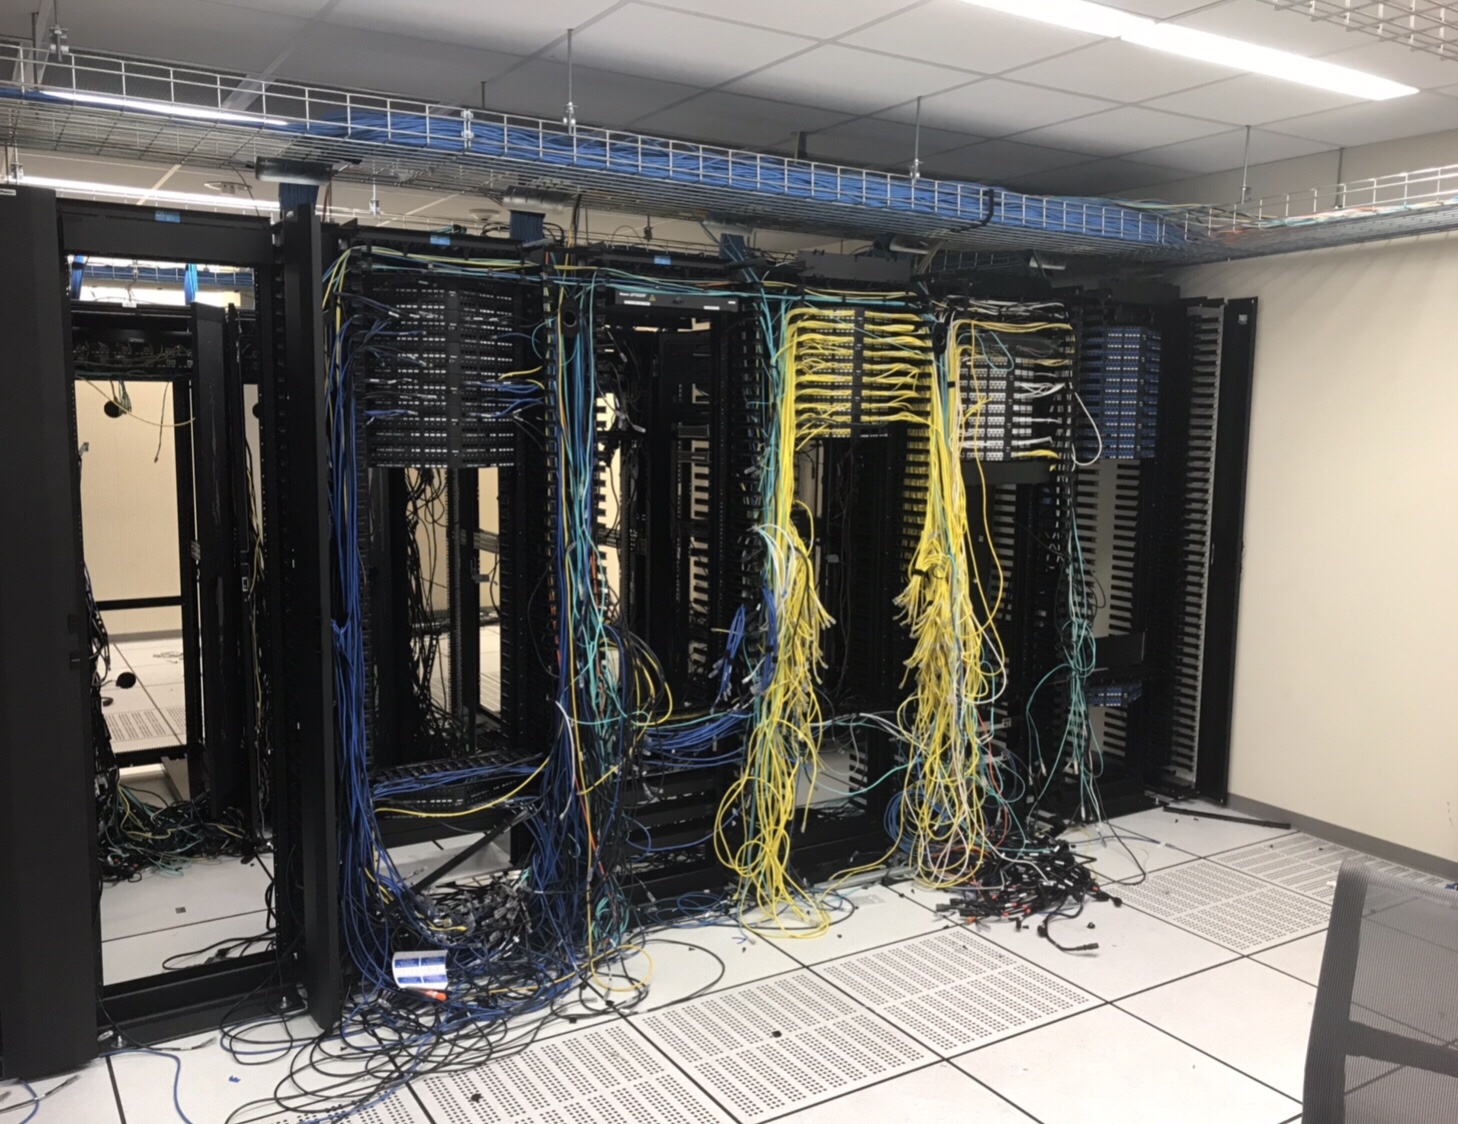
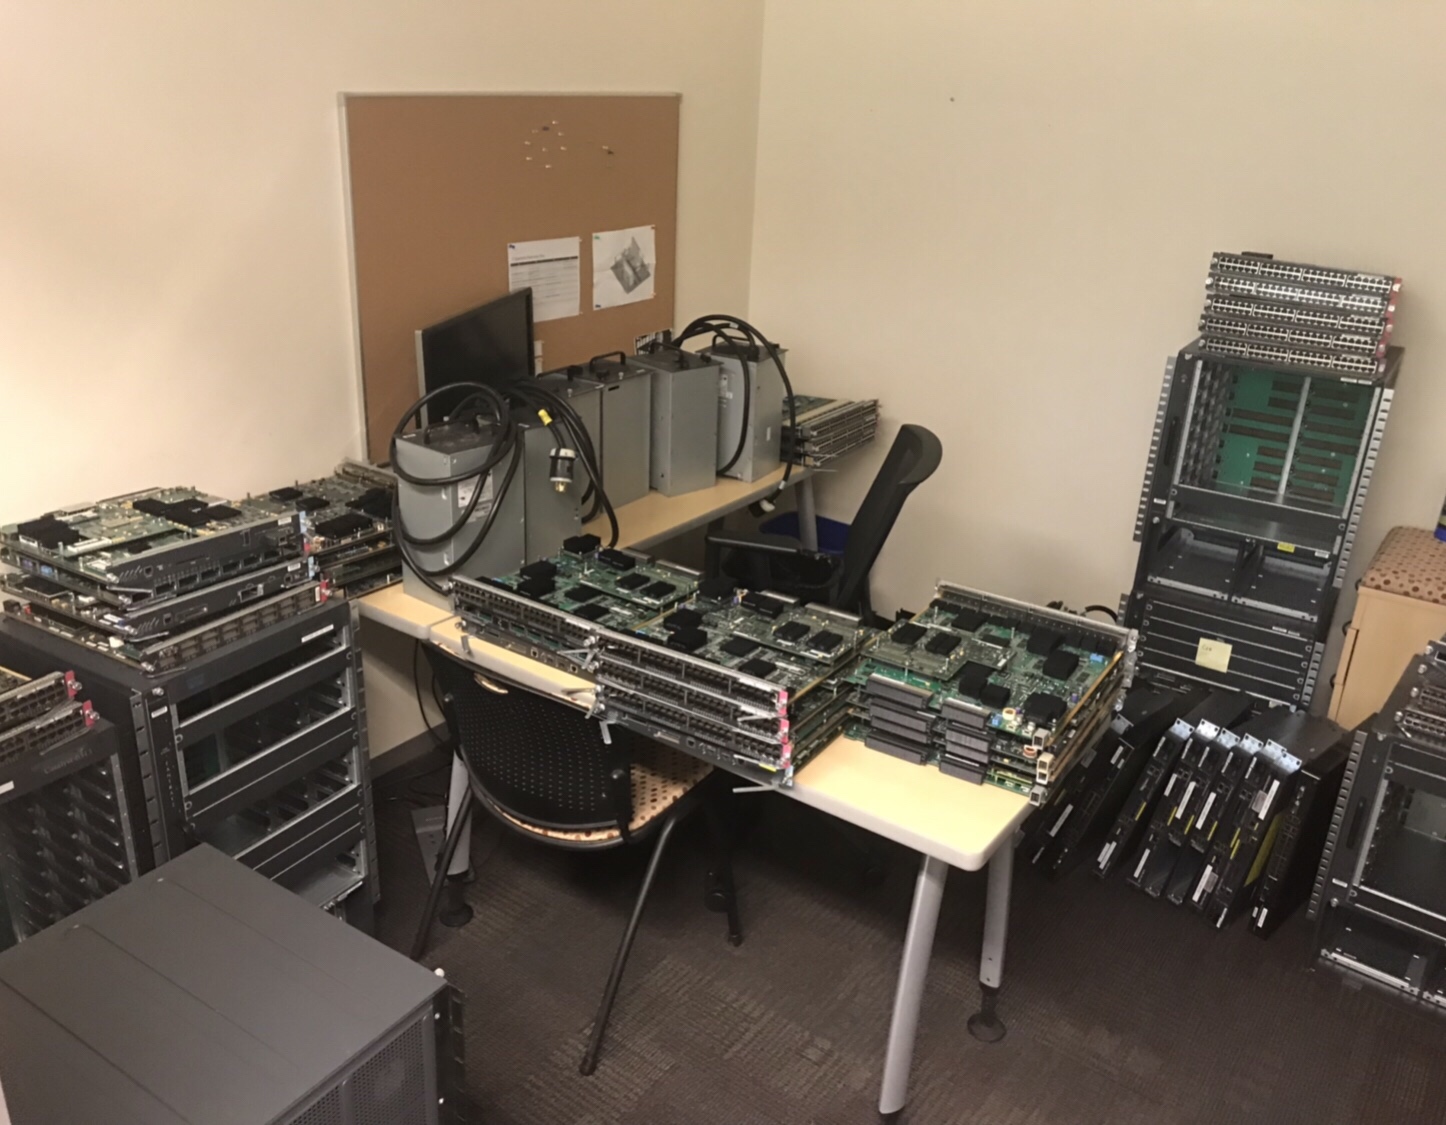
We moved our company internal Data Centre to a COLO Facility 2 weeks ago, here is what is left. Before and After Pictures, as well as a photo of the “Boneyard”. A pretty good haul for E-Wasting:

2x Cisco 6909’s

3x Cisco 6513’s

8x Cisco ASA’s

2x Brocade Loadbalancers

4x Cisco 2900 Routers

2x Cisco Nexus 5k

1x Cisco Wireless LAN Controller


GNS3 : Install and Configure

This install is intended for running IOU/IOL images on the GNS3 VM because it is the preferable way of running IOS in GNS3 now.

Pre-Requisites:

  1. Install VMware Workstation Player
    http://www.vmware.com/products/player/playerpro-evaluation.html
  2. Install VMware VIX API
    https://www.vmware.com/support/developer/vix-api/
  3. Install Wireshark
    https://www.wireshark.org/download.html
    Install WinPCAP provided by Wireshark


Install GNS3:

  1. Install GNS3
    https://www.gns3.com/software/download
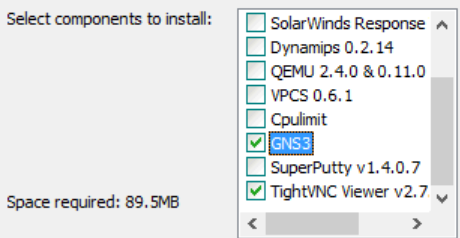
  2. Install only the following components:

  1. We don’t need Dynamips/QEMU/VPCS/Cpulimit because we’ll be running everything off of the GNS3 VM server.  We don’t install SuperPutty from here because its not the latest version and the first thing it does when you open it is bug you about upgrading to the latest version.  There are setup instructions for it below.

Install Loopback Adapter

  1. Open an Admin Command Prompt

cd “c:\Program Files\gns3”

loopback-manager.cmd

  1. Install a new Loopback interface (reboot required)
  2. Reboot
  1. Rename the new Loopback adapter to “Loopback”
  2. Assign it an IP address


Setup GNS3 VM:

  1. Download the GNS3 VM version that matches the installed GNS3 version
    https://github.com/GNS3/gns3-gui/releases
  2. Import the VM and keep the defaults
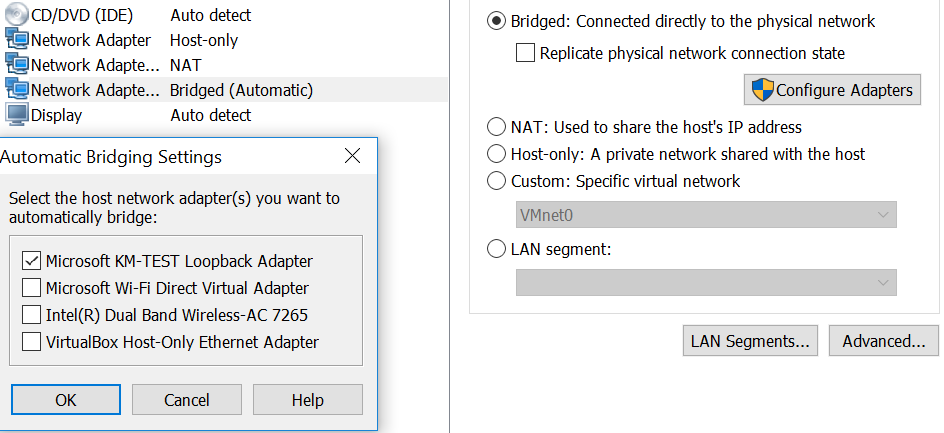
  3. Add a 3rd Network Adapter that will be in Bridged mode and connected to the Loopback adapter (Microsoft KM-TEST Loopback Adapter)

  1. Power on the VM
  2. SSH into the VM using gns3/gns3 for the credentials
    1. Sudo to root and run the following:
      1. echo ‘127.0.0.127 xml.cisco.com’ >> /etc/hosts
  3. Leave the VM powered on, we’re done with it for now
  4. Open an Administrator command prompt
  5. cd into the GNS3 install directory and run the following:
    1. IMPORTANT: On my work laptop, added the additional interfaces broke network connectivity to the VM after they were added.  I have no idea why but after I reinstalled VMware Workstation which uninstalled all the adapters, I was able to connect to the VM again.  On the work laptop, I’m running without the additional adapters and it seems fine so far.
    2. vmnet-manager.cmd
    3. Select option 1 which will add the vmnet interface 2 to 19 (this can take a while, please be patient)
    4. If it looks like this process has hung, you follow step 2 in the url below to add the adapters
      https://www.gns3.com/support/docs/how-to-use-vmware-player-in-gns3


Configure GNS3 to use the GNS3 VM server:

  1. Open up GNS3
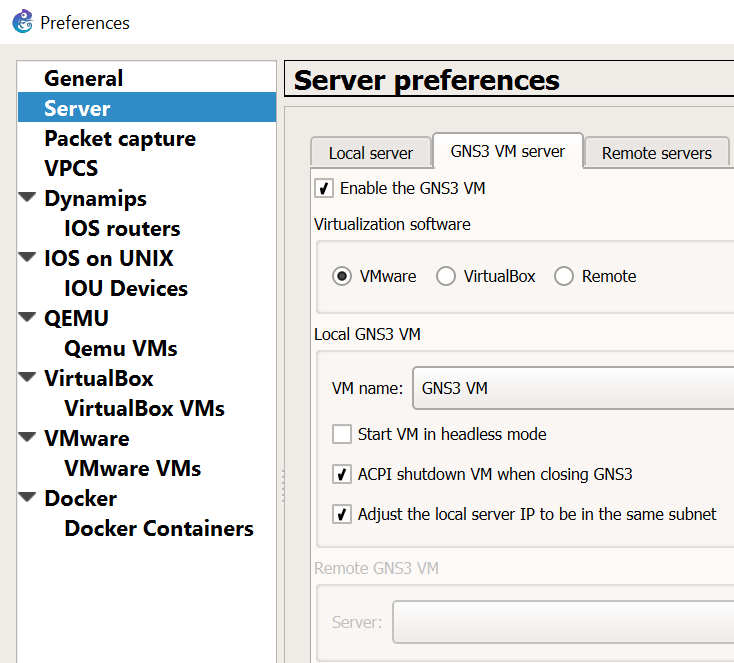
  2. Goto Edit > Preferences

    Be sure to leave “Start VM in headless mode” unchecked.  I ran into issues where the VM would not automatically startup when opening GNS3 and also cause the GNS3 process to linger when closing out of it.
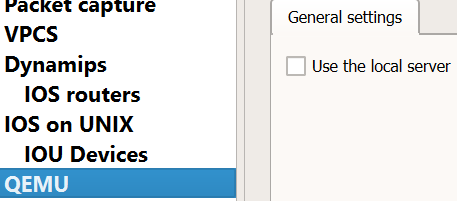
  3. Disable “Use of the local server” for Dynamips and QEMU.  We’ll use the GNS3 VM instead for running those processes.

Packet capture VPCS Dynamips IOS routers General settings Use the local server Path to Dynamips:


Create the L2/L3 IOU Devices:

  1. Goto Edit > Preferences
  2. Set the iourc file to use with the license (IOU devices need a license to run)
  3. Create the L2 image:
  4. Create the L3 image:

Add Device Image

New appliance template > Add and IOU > Run the IOU > New Image > Browse


i86bi-linux-l2-ipbasek9-15.1e.bin – IOU-L2

i86bi-linux-l3-adventerprisek9-15.4.2T.bin – IOU-L3


Operational Notes:

  • Sometimes a restart of all the routers/switches are required when new links are created between devices.  Even though the line protocols show as up, I’ve found a restart is required for traffic to actually pass through them.


If you want to use SuperPutty as the SSH client for GNS3 click this link:
SuperPutty with GNS3

Cisco : Serial Numbers

Today I have spent some time trying to find serial numbers on multiple Cisco devices, some Routers, Switches, Firewalls and Wireless LAN Controllers. Here is 7 ways I have found:

  1. Locate the serial number tag on the device chassis.
  2. The serial number is displayed in the banner during boot.
  3. “show version” command. (Look for Processor board ID or S/N)
  4. “show inventory” command. (Look for Hw Serial# or SN:)(Also works on WLC’s)
  5. “show diag” command. (Look for Chassis Serial Number)
  6. “show hardware” command. (Look for Processor board ID or S/N)
  7. “show tech-support” command. 

Cisco/Brocade : Basic Similar Commands

  • Here are some basic switch commands and the Cisco to Brocade differences, even though the OS’s are similar they have some subtle differences.

Task

Cisco

Brocade

Configure a VLAN

Interface vlan 2

Vlan 2

Configure a trunk port

Int fa0/1

Switchport trunk encap dot1q

Switchport mode trunk

Vlan 2

Tagged eth 0/1/1

Vlan 3

Tagged eth 0/1/1

Vlan 4

Tagged eth 0/1/1

Interface ethernet 0/1/1

Dual-mode 1

Configure a access port

Int fa0/1

Switchport access vlan 2

Vlan 2

Untagged eth 0/0/1

Configure an IP address on a VLAN

Int vlan2

Ip address 192.168.1.1 255.255.255.0

Vlan 2

Router interface ve 1

Interface ve1

Ip address 192.168.1.1 255.255.255.0

Configure a range of ports

Int range fa0/1-10

Int eth 0/1/1 to 0/1/5

Configure a port for both voice and data vlans

Int fa0/1

Switchport access vlan2

Switchport voice vlan3

vlan2

Tagged eth 0/1/1

vlan3

Tagged eth 0/1/1

Inter eth 0/1/1

Dual-mode 1

Voice-vlan 3

Inline power

Show the interface status of a port/vlan

Sh int fa0/1

Show int eth 0/1/1

See CDP Neighbors

Show cdp neighbors

Show fdp neighbors

Ruckus/Brocade : Configure Spanning Tree 802.1w/RSTP

I want to point out that Ruckus/Brocade has 2 commands that contradict each other when configuring Spanning Tree:

Brocade(config-vlan-1)#spanning-tree  ?

  802-1w          Enable Rapid Spanning Tree IEEE 802.1w
  rstp                  Enable Rapid Spanning Tree

Since RSTP is the same as 802.1w further clarification is needed.

Brocade(config-vlan-1)#spanning-tree rstp  is a Brocade early implementation of the IEEE 802.1W which provided only a subset of the standard, whereas the

Brocade(config-vlan-1)#spanning-tree  802-1w feature provides the full standard, so basically you should use 802.1w.

How to configure Spanning Tree on Brocade

Ran mainly on a per VLAN basis.

Brocade# conf t
Brocade (config)#vlan 1
Brocade (config-vlan-1)#  spanning-tree 802-1w – enabled spanning tree basic mode
Brocade (config-vlan-1)# show 802-1w – shows spanning tree information
Brocade (config-vlan-1)# spanning-tree 802-1w priority 0 – to designate that switch Root bridge

If you know there is a point to point link between 2 rapid spanning tree devices you have to turn that on at the interface level

Point-to-Point/Uplinks
Brocade (config-vlan-1)#int e 1/1/1
Brocade (config-if-e10000-1/1/1)# spanning-tree 802-1w admin-p2pt-mac – don’t allow for a broadcast domain, assume there is a link between 2 rapid spanning tree root bridges/uplinks ( without this it will fail over in 2 seconds or less, but fail back takes the traditional 30 of listening and learning, but this allows it to fail forward and back in 2 seconds or less

Access/Edge-Ports
Brocade (config-if-e10000-1/1/1)# int e 1/1/3 to 1/1/24

Brocade (config-if-e10000-1/1/3-1/1/24)#  spanning-tree 802-1w admin-edge-port (not really required, just means topology changes on the edge is not going to cause re-convergence on the core links or vice versa

Brocade (config-if-e10000-1/1/3-1/1/24)#  show run – will see spanning tree on the VLAN and the int ports

***DO NOT USE VLAN1 IN PRODUCTION, THIS IS PURELY FOR DEMONSTRATION PURPOSES***

Brocade : SSH Setup

Delete Crypto Key

Conf t

Crypto key zeroize

Generate Key Pair

Conf t

Crypto key generate <CR> – will create a DSA Key pair

crypto key generate rsa modulus 2048 – 2048 RSA Key

Create Local Username and Password

Username nocadmin password <password>

Enable AAA

Aaa authentication login default local

Verify

Show who – shows SSH connections

Cisco : IOS Upgrade to Denali

CATALYST IOS UPGRADE TO DENALI

You can copy the files to the router from your local pc with the Fenix web server.

Right click on the file in the Fenix web browser > copy link > use the copy command on the device.

Copy OS file to flash:

Copy usbflash0:<filename> flash:<filename>

                  verify /md5 bootflash:<image_file>

On XE 3.x

software install file flash:<filename> new force

On Denali 16.x

request platform software package install switch all file flash: <filename> auto-copy

Troubleshooting

Clean OS’s in Denali

Request platform software package clean switch all file flash:

If Versions are Mismatches in XE

% Switch # is running incompatible software.

Compatible software must be installed on this switch before performing the current operation.

Switch#software auto-upgrade

If Versions are Mismatches in Denali

device(config)#software auto-upgrade enable

UPGRADE 3.6+ IF MASTER SWITCH IS ON DENALI 16.3

request platform software package install autoupgrade

Cisco : IOS Catalyst Upgrade

CATALYST IOS UPGRADE

From the switch, do the following

Get an MD5 hash to verify the image is intact

                verify /md5 bootflash:<image_file>

Set the config to boot from the new image

               boot system flash bootflash:<image_file>

Save the config and reload

              write mem
              reload

The switch comes back up with the new image

             sh version

Save the config

             write mem

Brocade : Dual Access Ports

Dual Access Ports : Data and Voice

You need to make the port dual-mode port. Configuring a tagged port as dual-mode allows it to accept and transmit both tagged and untagged traffic at the same time. For example, I am going to connect a phone and a laptop to a port 1/1/1. This port is running in dual mode having a tagged membership in VLAN 13 (phone) and untagged membership in VLAN 12 (laptop).

Brocade (config)# vlan 12
Brocade (config-vlan-12)# tagged eth 1/1/1
Brocade (config-vlan-12)# vlan 13
Brocade (config-vlan-13)# tagged eth 1/1/1
Brocade (config-vlan-13)# int eth 1/1/1
Brocade (config-if-e1000-1/1/1)# dual-mode 12 – this command changes from the native vlan to vlan 12 which is for the data port and should be untagged.