Ruckus : Configure Link Aggregation Group

This is how to build a Link Aggregation Group on the Ruckus 7150. It is slightly different on the 7250’s.


tpwsw1# conf t


Configure the Link Aggregation Group. There are multiple LAG types and they must match on both sides of the lag, other vendors may use different names for the same thing here are the common ones:

Ruckus LAG Types Other Vendor Types
Static On
Dyanmic Active

Configure a static LAG.

tpwsw1(config)# lag <name-of-the-lag> static id 1


Configure a dynamic LAG.

tpwsw1(config)# lag <name-of-the-lag> dynamic id 1


The LAG ID can be automatically generated and assigned to a LAG using the auto option.

tpwsw1(config)# lag <name-of-the-lag> dynamic id auto


The Link Aggregation Group IDs are unique for each LAG on the switch. The LAG ID can’t be assigned to more than one LAG. If a LAG ID is already used, the CLI will reject the new LAG configuration and display an error message that suggests the next available LAG ID that can be used.

Once the LAG is built you have to add ports to the LAG.

tpwsw1(config-lag-<name-of-the-lag>)# ports ethernet 1/2/7 ethernet 1/2/8


Arista : MLAG Setup


Notice: Trying to access array offset on value of type null in /home/minted6/thepacketwizard.com/wp-content/plugins/amazon-associates-link-builder/vendor/mustache/mustache/src/Mustache/Parser.php on line 278

I have recently been setting up some Arista switches for a network refresh at our Boston site.

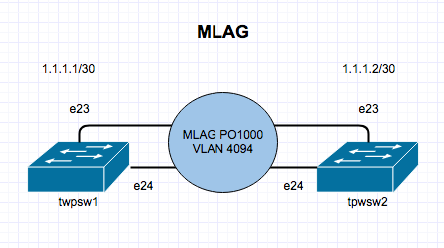
MLAG is short for Multi Chassis Link Aggregation and it allows more than 1 switch usually 2, to act like one logical switch which can allow you to just manage one switch instead of multiple. It also helps with redundancy and diversify paths. Its an awesome technology.  Here is the basic MLAG Topology:

1. Create Port Channel For Peer Links

I am using 2 Arista DCS-7150S-24-R switches with 2 10Gb Ethernet as our MLAG peer links. On each switch we will create a port channel 1000

 tpwsw1# config t
 tpwsw1(conf)#interface e23-24
 tpwsw1(config-if-Et23-24)# channel-group 1000 mode active
 tpwsw1(config-if-Et23-24)# interface port-channel 1000
 tpwsw1(config-if-Po1000)# switchport mode trunk


2. Create a VLAN for Peer MLAG Communication

You need to create a separate VLAN for MLAG communication and assign it the mlag-peer trunk group and disable spanning-tree on the VLAN. This step is done on both switches.

 tpwsw1(conf)#vlan 4094
 tpwsw1(config-vlan-4094)# trunk group mlag-peer
 tpwsw1(config-vlan-4094)# interface port-channel 1000
 tpwsw1(config-if-Po1000)# switchport trunk group mlag-peer
 tpwsw1(config-if-Po1000)# exit
 tpwsw1(conf)#no spanning-tree vlan 4094


 tpwsw2(conf)#vlan 4094
 tpwsw2(config-vlan-4094)# trunk group mlag-peer
 tpwsw2(config-vlan-4094)# interface port-channel 1000
 tpwsw2(config-if-Po1000)# switchport trunk group mlag-peer
 tpwsw2(config-if-Po1000)# exit
 tpwsw2(conf)#no spanning-tree vlan 4094


3. Set an IP on each Switch
On VLAN 4094 that was created above, we need to assign it an IP so each switch can communicate over layer 3 with each other.


tpwsw1(conf)#int vlan 4094
tpwsw1(config-if-Vl4094)# ip address 1.1.1.1/30


tpwsw2(conf)#int vlan 4094
tpwsw2(config-if-Vl4094)# ip address 1.1.1.2/30

***Send some pings to confirm basic connectivity


4. Configure MLAG peering for each switch

 tpwsw1(config)#mlag
 tpwsw1(config-mlag)#local-interface vlan 4094
 tpwsw1(config-mlag)#peer-address 1.1.1.2
 tpwsw1(config-mlag)#peer-link port-channel 1000
 tpwsw1(config-mlag)#domain-id mlagDOMAIN


 tpwsw2(config)#mlag
 tpwsw2(config-mlag)#local-interface vlan 4094
 tpwsw2(config-mlag)#peer-address 1.1.1.1
 tpwsw2(config-mlag)#peer-link port-channel 1000
 tpwsw2(config-mlag)#domain-id mlagDOMAIN


5. Verify MLAG Domain
On each switch, do a #show mlag to see if MLAG is up and running and you can confirm this by seeing State:Active and peer-link status: UP and locl-int status:UP

tpwsw1(config-mlag)#show mlag
MLAG Configuration:
domain-id : mlagDOMAIN
local-interface : Vlan4094
peer-address : 1.1.1.2
peer-link : Port-Channel1000
MLAG Status:
state : Active
negotiation status : Connected
peer-link status : Up
local-int status : Up
system-id : 02:1c:73:1e:97:dc
MLAG Ports:
Disabled : 0
Configured : 0
Inactive : 0
Active-partial : 0
Active-full : 0


tpwsw2(config-mlag)#show mlag
MLAG Configuration:
domain-id : mlagDOMAIN
local-interface : Vlan4094
peer-address : 1.1.1.1
peer-link : Port-Channel1000
MLAG Status:
state : Active
negotiation status : Connected
peer-link status : Up
local-int status : Up
system-id : 02:1c:73:1e:97:dc
MLAG Ports:
Disabled : 0
Configured : 0
Inactive : 0
Active-partial : 0
Active-full : 0


You can read more about MLAG here – https://www.arista.com/en/products/multi-chassis-link-aggregation-mlag

A great book to read about Arista is called Arista Warrior. I loved it. You can buy it here:

Ruckus : L3 Routing Image on Switch

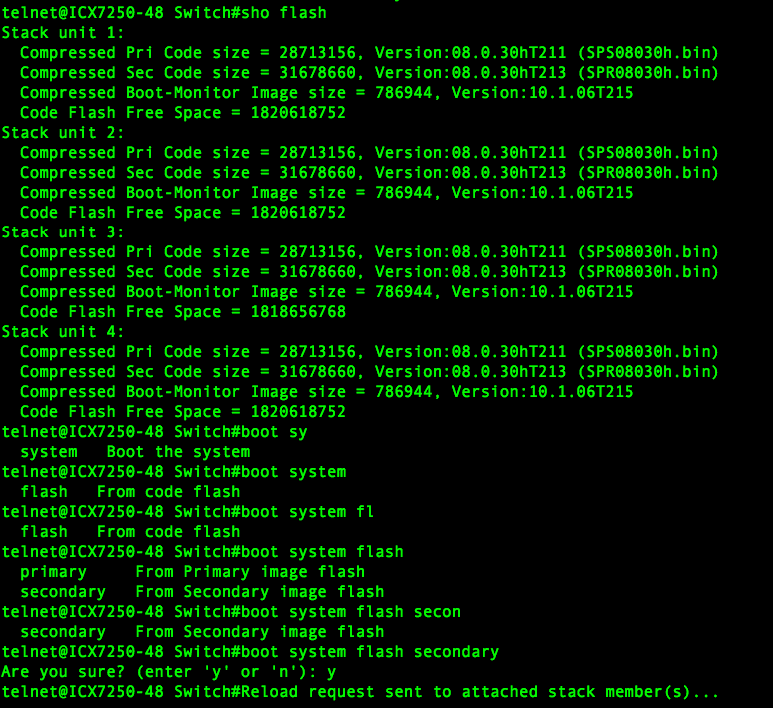
There are 2 different versions of code for the ICX switches depending on what you are doing with them. Layer 3 or Layer 2. If you are going to be doing L3, you will need a license for that.

Software on the device is listed within:


 #show flash


SPS – S is for Switching

SPR – R is for Routing

Ruckus Recommend if you are using L3 then to boot the system to SPR.

Once it has rebooted do not forget to make sure you set it to boot from the Router image if the switch was to reboot for any reason. (make sure you are in configure terminal mode or you will cause a reboot)

Avoid this!!!

This is correct in (config) mode

Ruckus : Licensing with TFTP & USB

This topic in my opinion is one of the really big downfalls of the Ruckus Switches and there are a couple, but I will leave that for another time. Licensing however, It is overly complicated, and a total waste of time. Why when you buy a piece of hardware it doesn’t come working the way you want it to, is beyond me. Ruckus have to fix this or they will lose customers. They recently told me that they had delivered 42 ICX switches to a customer. When I thought about the licensing process that needs to be done on each device, I think I would have quit on the spot. Luckily…I only had to license 4…for now. This however is not normal practice,  Here Goes:

When you buy a license key wether it be for Layer 3 or 10G ports you need a transaction key and then you need a License ID.

To get the LicenceID you need to run the command:

#show version

The you need to go to https://support.ruckuswireless.com/code_registration (you will need a ruckus account for this). The License Code comes in a separate Email (if you don’t receive that you may need to contact support). Follow the steps online:


They then have you download a file or they will send you a xml file.
(I recommend opening up the XML file and naming them something better than what they send you).

For USB Install

Copy the XML License Files to USB Stick

View Current License

#Show license

View License files on USB on Switch

# show files disk0

Copy license files from USB to Switch

#Copy disk0 license <license-filename> unit <switch-number>

For TFTP Install

Copy files from TFTP Server to Switch

#copy tftp license <tftp-server-ip> <license-filename> unit <switch-number>

Delete License

#Licence delete unit <switch number>

Verify License

#show license

Ruckus : ICX Add Unit to Existing Stack

Continuing my theme from last week with the Ruckus ICX Switches. Here is how to add a switch to a stack hot.

Show existing Stack

#Stack secure-setup

Which will discover the new device. Election will run and reboot the newly Stacked Units.

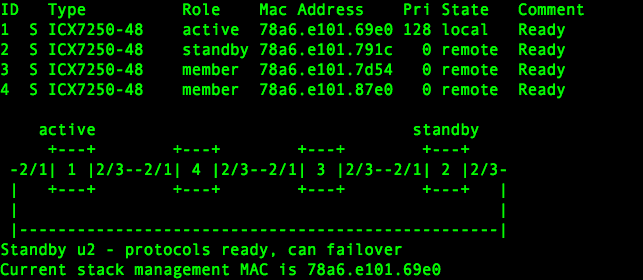
#show stack

‘Wr mem’ on the master switch


Ruckus : ICX Initial Stacking Configuration

As you may know Brocade ICX switching line was purchased by Ruckus Networks. I have been messing with the Ruckus ICX 7250. Here is the steps to stack them using their Twin-AX cables.

Firstly stacking ICX switches has to be done on 10G Ports, so firstly you have to verify you have the correct license for those ports with the command:

# show license

As you can see from the output there 2 licensed 10G ports and that is the minimum you need to stack.

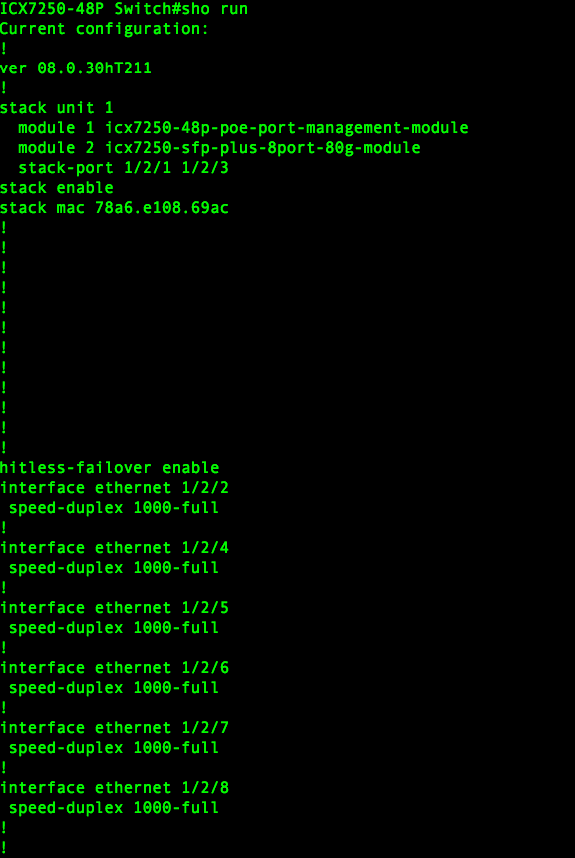
Doing a ‘show run’ confirms that 1/2/1 and 1/2/3 are set to 10G because they DO NOT show up in show run.


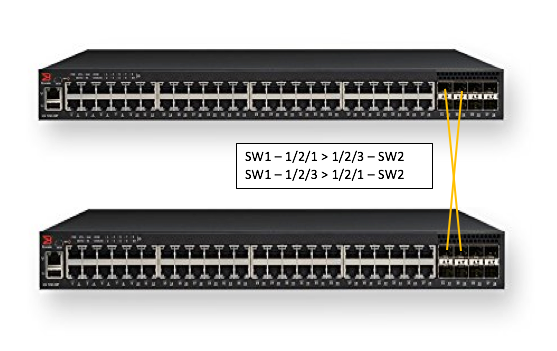
Once the 10G ports have been confirmed you can stack them. Here is how.

I have included a link where you can see the cost or purchase these devices:

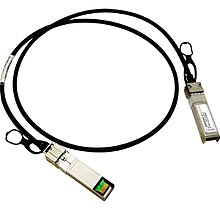
Here is a picture of a Twin-AX Cable

I have included a link where you can see the cost or purchase these devices:

Once the Cables are connected you only have to enable stacking on one switch

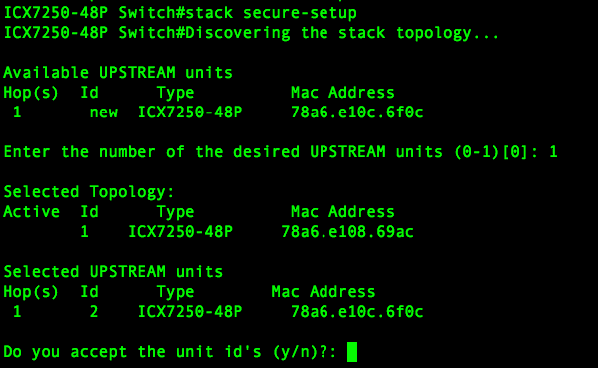
Now search for the other devices connected to the stack and confirm you want them part of the election process, then all the non master switches will reboot.

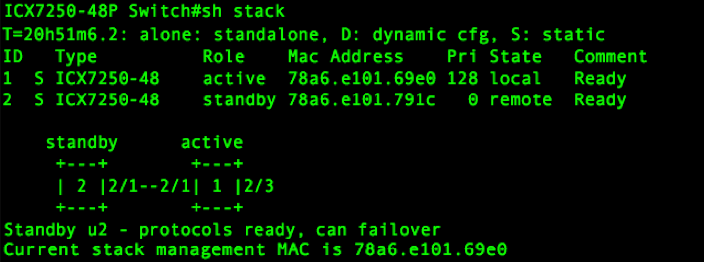
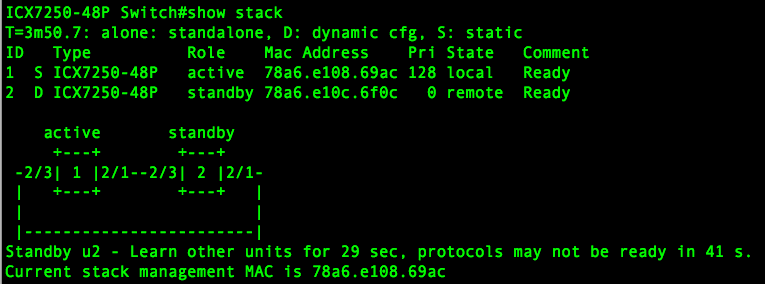
Once the members have rebooted you can verify the stack us up and also shows the connections between the stack ports

Don’t forget to Save

#wr mem


Cisco : Enable SSH on Cisco Switch, Router and ASA

When you configure a Cisco device, you need to use a console cable and connect directly to the system to access it. Follow the SSH setup below, will enable SSH access to your Cisco devices, since SSH is not enabled by default. Once you enable SSH, you can then access it remotely using SecureCRT or any other SSH client.

Set hostname and domain-name

The hostname has to have a hostname and domain-name.

switch# config t
switch(config)# hostname tpw-switch
tpw-switch(config)# ip domain-name thepacketwizard.com

Setup Management IP

In the following example, the management ip address will be set to 10.100.101.2 in the 101 VLAN. The default gateway points to the firewall, which is 10.100.101.1

tpw-switch# ip default-gateway 10.100.101.1
tpw-switch# interface vlan 101
tpw-switch(config-if)# ip address 10.100.101.2 255.255.255.0

Generate the RSA Keys

The switch or router should have RSA keys that it will use during the SSH process. So, generate these using crypto command as shown below.

tpw-switch(config)# crypto key generate rsa
  The name for the keys will be: tpw-switch.thepacketwizard.com
  Choose the size of the key modulus in the range of 360 to 2048 for your
    General Purpose Keys. Choosing a key modulus greater than 512 may take
    a few minutes.

How many bits in the modulus [512]: 1024
  % Generating 1024 bit RSA keys, keys will be non-exportable...[OK]

Setup the Line VTY configurations

Setup the following line vty configuration, where input transport is set to SSH only. Set the login to local, and password to 7, and make sure Telnet is not enabled:

tpw-switch# line vty 0 4
 tpw-switch(config-line)# transport input ssh
 tpw-switch(config-line)# login local
 tpw-switch(config-line)# password 7
 tpw-switch(config-line)# exit

If you have not set the console line yet, use the following:

tpw-switch# line console 0
tpw-switch(config-line)# logging synchronous
tpw-switch(config-line)# login local

Create the username password

If you don’t have an username created already, here is how:

tpw-switch# config t
Enter configuration commands, one per line.  End with CNTL/Z.
tpw-switch(config)# username thepacketwizard password tpwpassword123
tpw-switch# enable secret tpwenablepassword

Make sure the password-encryption service is turned-on, which will encrypt the password, and when you do “show run”, you’ll see only the encrypted password and not clear-text password.

tpw-switch# service password-encryption

Verify SSH access

From the switch, if you do ‘show ip ssh’, it will confirm that the SSH is enabled on this Cisco device.

tpw-switch# show ip ssh
 SSH Enabled - version 1.99
 Authentication timeout: 120 secs; Authentication retries: 3

After the above configurations, login from a remote machine to verify that you can ssh to this cisco switch.

In the example, 10.100.101.2 is the management ip-address of the switch.

TPW-Remote-Computer# ssh 10.100.101.2
 login as: thepacketwizard
 Using keyboard-interactive authentication.
 Password:

tpw-switch>en
 Password:
 tpw-switch#

You are now setup and logged in on SSH!

To read more on SSH visit: https://en.wikipedia.org/wiki/Secure_Shell

Cisco : MACSec (Media Access Control Security)

This describes how to enable MACSec (Media Access Control Security) Encryption between two Catalyst Switches. MACSec is the standard for authenticating and encrypting the data link layer between switches. IEEE 802.1.AE.

Configuring MACSec

interface TenGigabitEthernet1/0/48
   cts manual
   no propagate sgt
   sap pmk 0000000000000000000000000000000000000000000000000000001234ABCDEF mode-list gcm-encrypt null no-encap

Below is an example config for Macsec with AES-256 encryption.   This config needs to be on both sides of the switches.  Was tested on a 3650-12x48UZ running ios-xe version 16.3.2.     Please update the keystring each time you use it with another random set of digits.  The length of the string has to be the same as below (64).

key chain mka_keychain macsec
    key 1234
    cryptographic-algorithm aes-256-cmac
 key-string 7586258746587645873490731985370957385753195709435175415784768466
 lifetime local 00:00:00 Jan 1 2000 infinite
 mka policy mka_policy_256
  key-server priority 2
 macsec-cipher-suite gcm-aes-256
interface GigabitEthernet1/0/1
 switchport mode trunk
 macsec network-link
 mka policy mka_policy_256
 mka pre-shared-key key-chain mka_keychain

Checking to Make sure the MKA Session is up and secure.

Switch#sh mka session

Total MKA Sessions....... 1

      Secured Sessions... 1

      Pending Sessions... 0

====================================================================================================

Interface      Local-TxSCI         Policy-Name      Inherited         Key-Server

Port-ID        Peer-RxSCI          MACsec-Peers     Status            CKN

====================================================================================================

Te1/0/48       00f6.6389.8b30/0037 test             NO                YES

55             00fe.c8d4.44b0/0037 1                Secured           1234000000000000000000000000000000000000000000000000000000000000

Verify MACSec is enabled.

Switch#sh macsec int ten1/0/48

MACsec is enabled
   Replay protect : enabled
   Replay window : 0
   Include SCI : yes
   Use ES Enable : no
   Use SCB Enable : no
   Admin Pt2Pt MAC : forceTrue(1)
   Pt2Pt MAC Operational : no
   Cipher : GCM-AES-256
   Confidentiality Offset : 0

Data Centre : Post DC Move Unracking

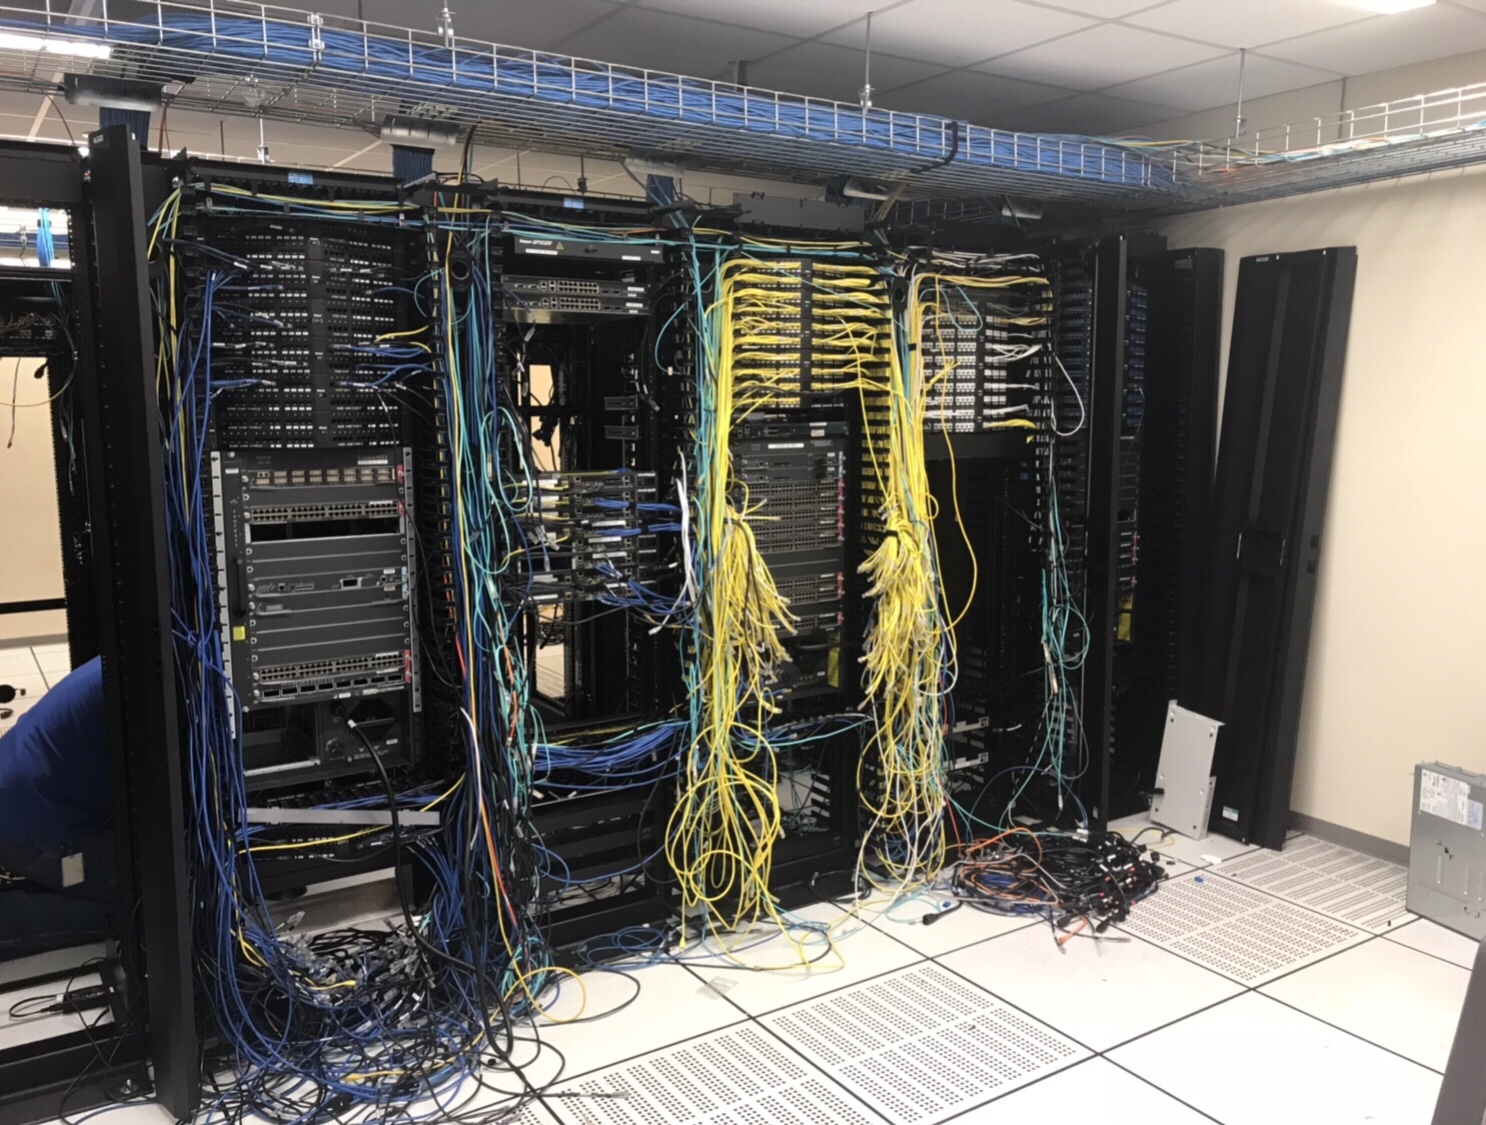
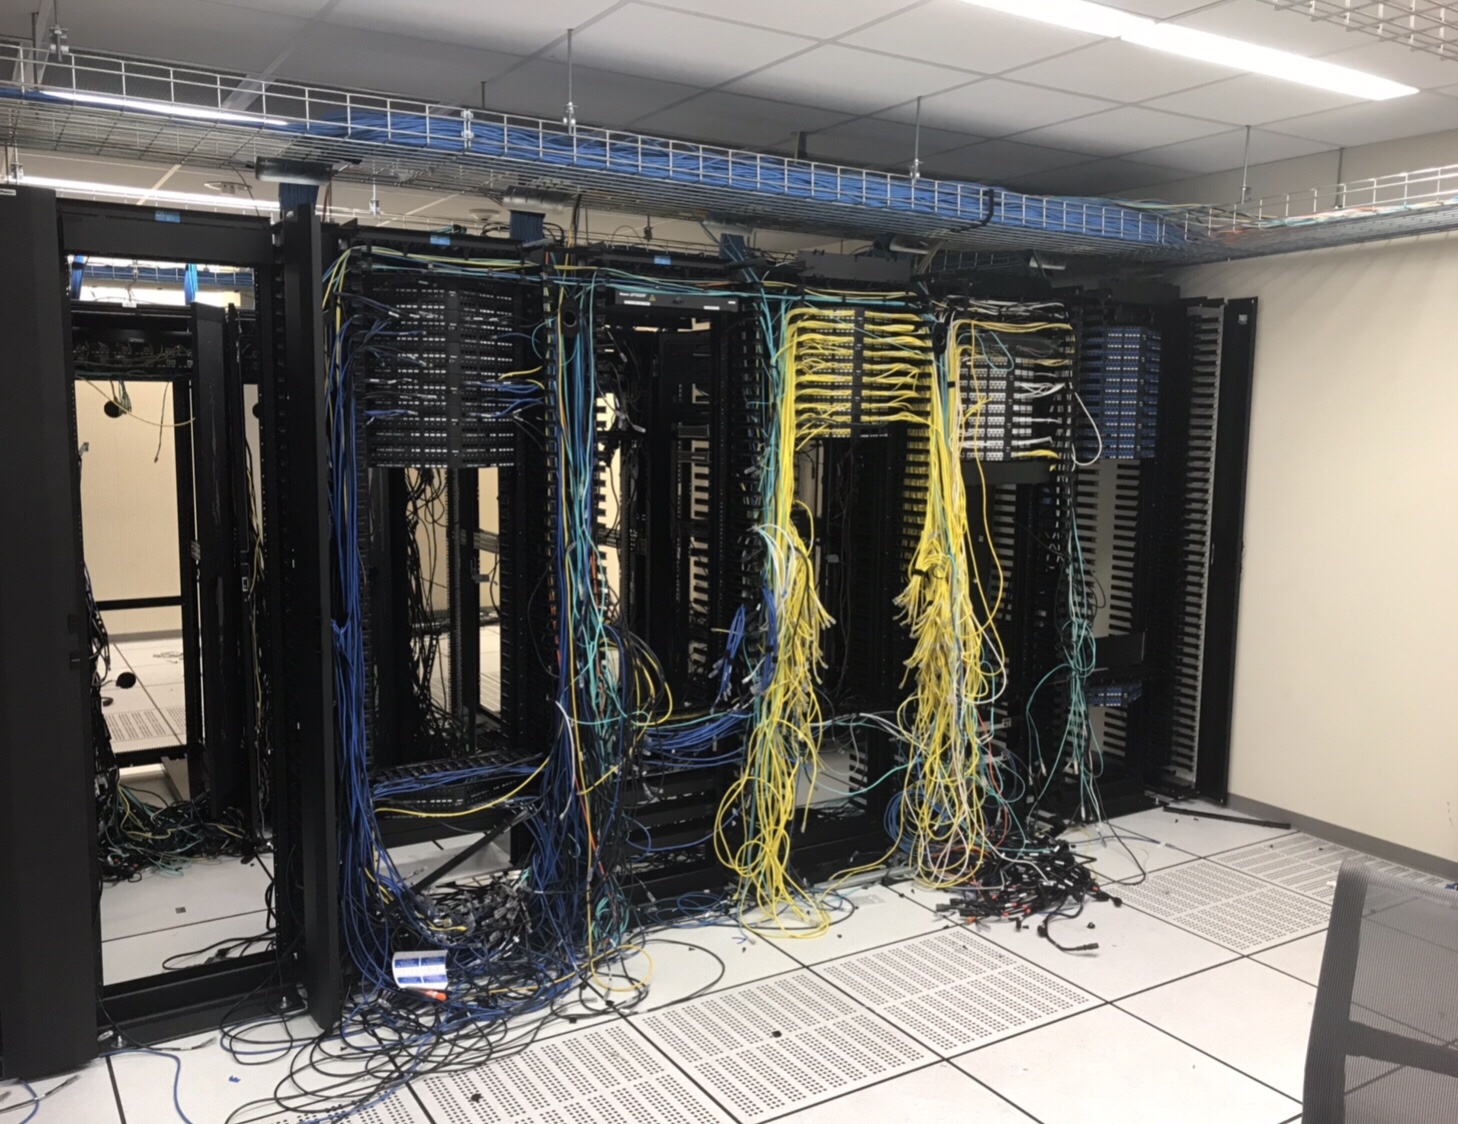
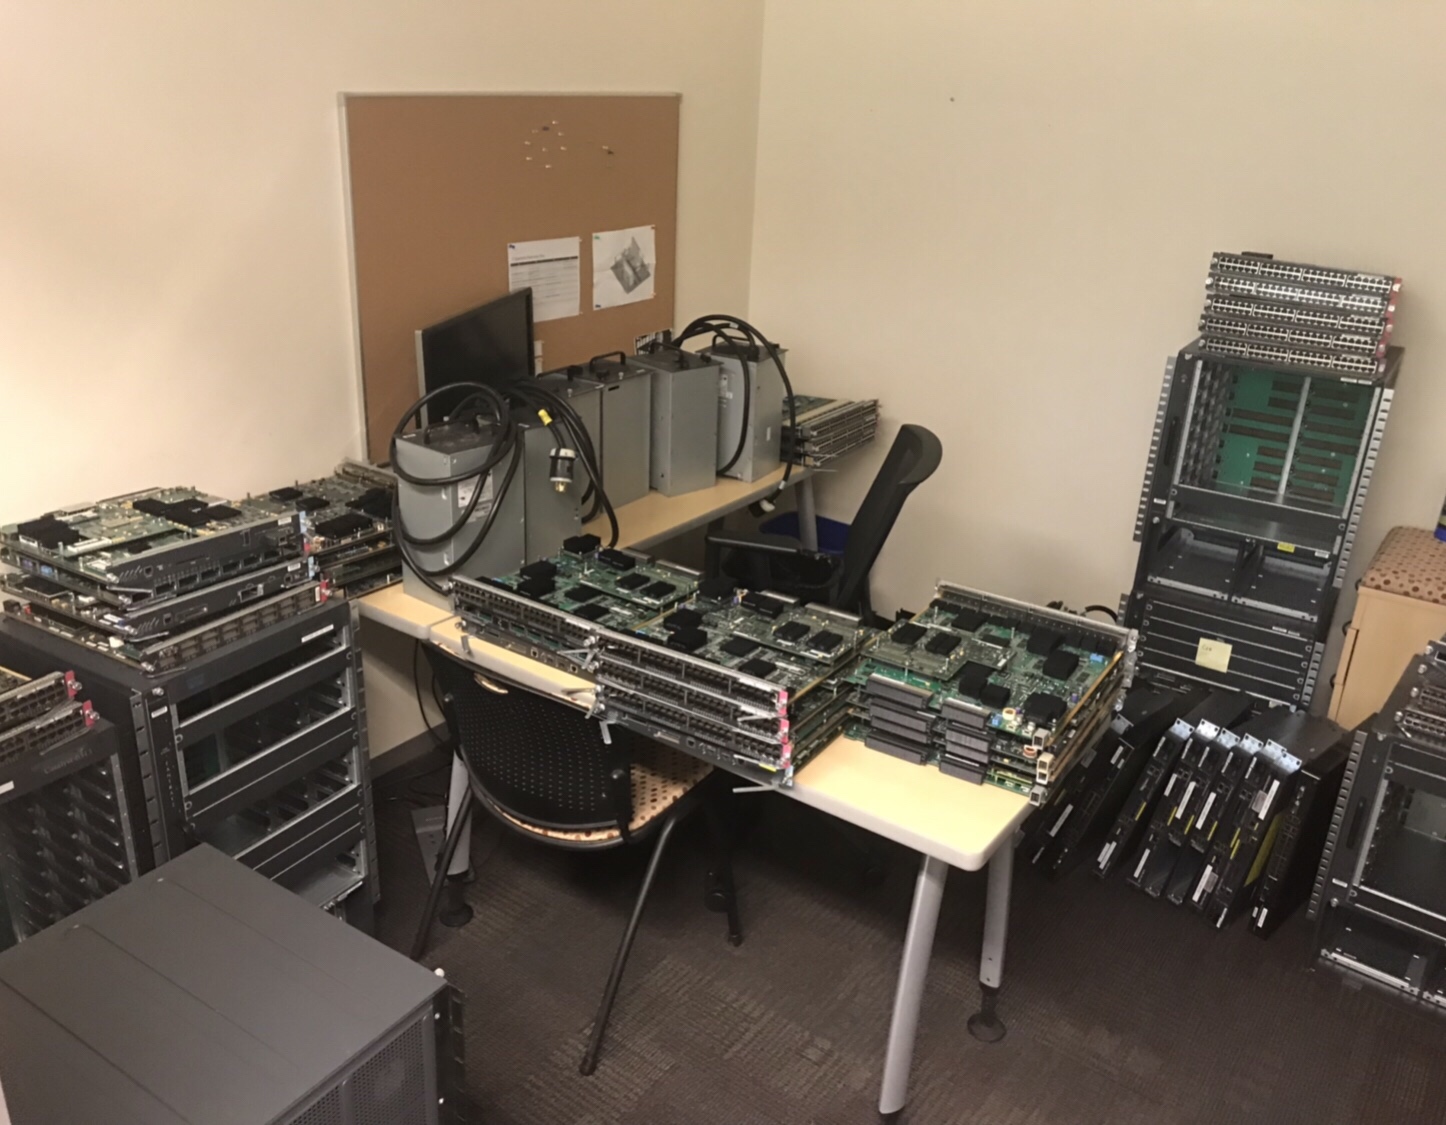
We moved our company internal Data Centre to a COLO Facility 2 weeks ago, here is what is left. Before and After Pictures, as well as a photo of the “Boneyard”. A pretty good haul for E-Wasting:

2x Cisco 6909’s

3x Cisco 6513’s

8x Cisco ASA’s

2x Brocade Loadbalancers

4x Cisco 2900 Routers

2x Cisco Nexus 5k

1x Cisco Wireless LAN Controller


Cisco : Serial Numbers

Today I have spent some time trying to find serial numbers on multiple Cisco devices, some Routers, Switches, Firewalls and Wireless LAN Controllers. Here is 7 ways I have found:

  1. Locate the serial number tag on the device chassis.
  2. The serial number is displayed in the banner during boot.
  3. “show version” command. (Look for Processor board ID or S/N)
  4. “show inventory” command. (Look for Hw Serial# or SN:)(Also works on WLC’s)
  5. “show diag” command. (Look for Chassis Serial Number)
  6. “show hardware” command. (Look for Processor board ID or S/N)
  7. “show tech-support” command.